Caterpillar Bracelet Tutorial!
It's the time of year where I see a lot of Wanderer butterflies! More commonly known worldwide as the Monarch butterfly ( Danaus plexippus), I have raised these butterflies from caterpillars in a little mesh enclosure outside for a couple of years now. I'll never stop finding it fascinating to watch them grow, pupate and hatch, nor tire of watching them flutter around my Milkweed plants.
This craft is something I saw on Pinterest, although couldn't track back the original creator of these bracelets. If anyone finds the original creator, please contact me to update this page with the due credit for the inspiration!
For this project, you'll need:
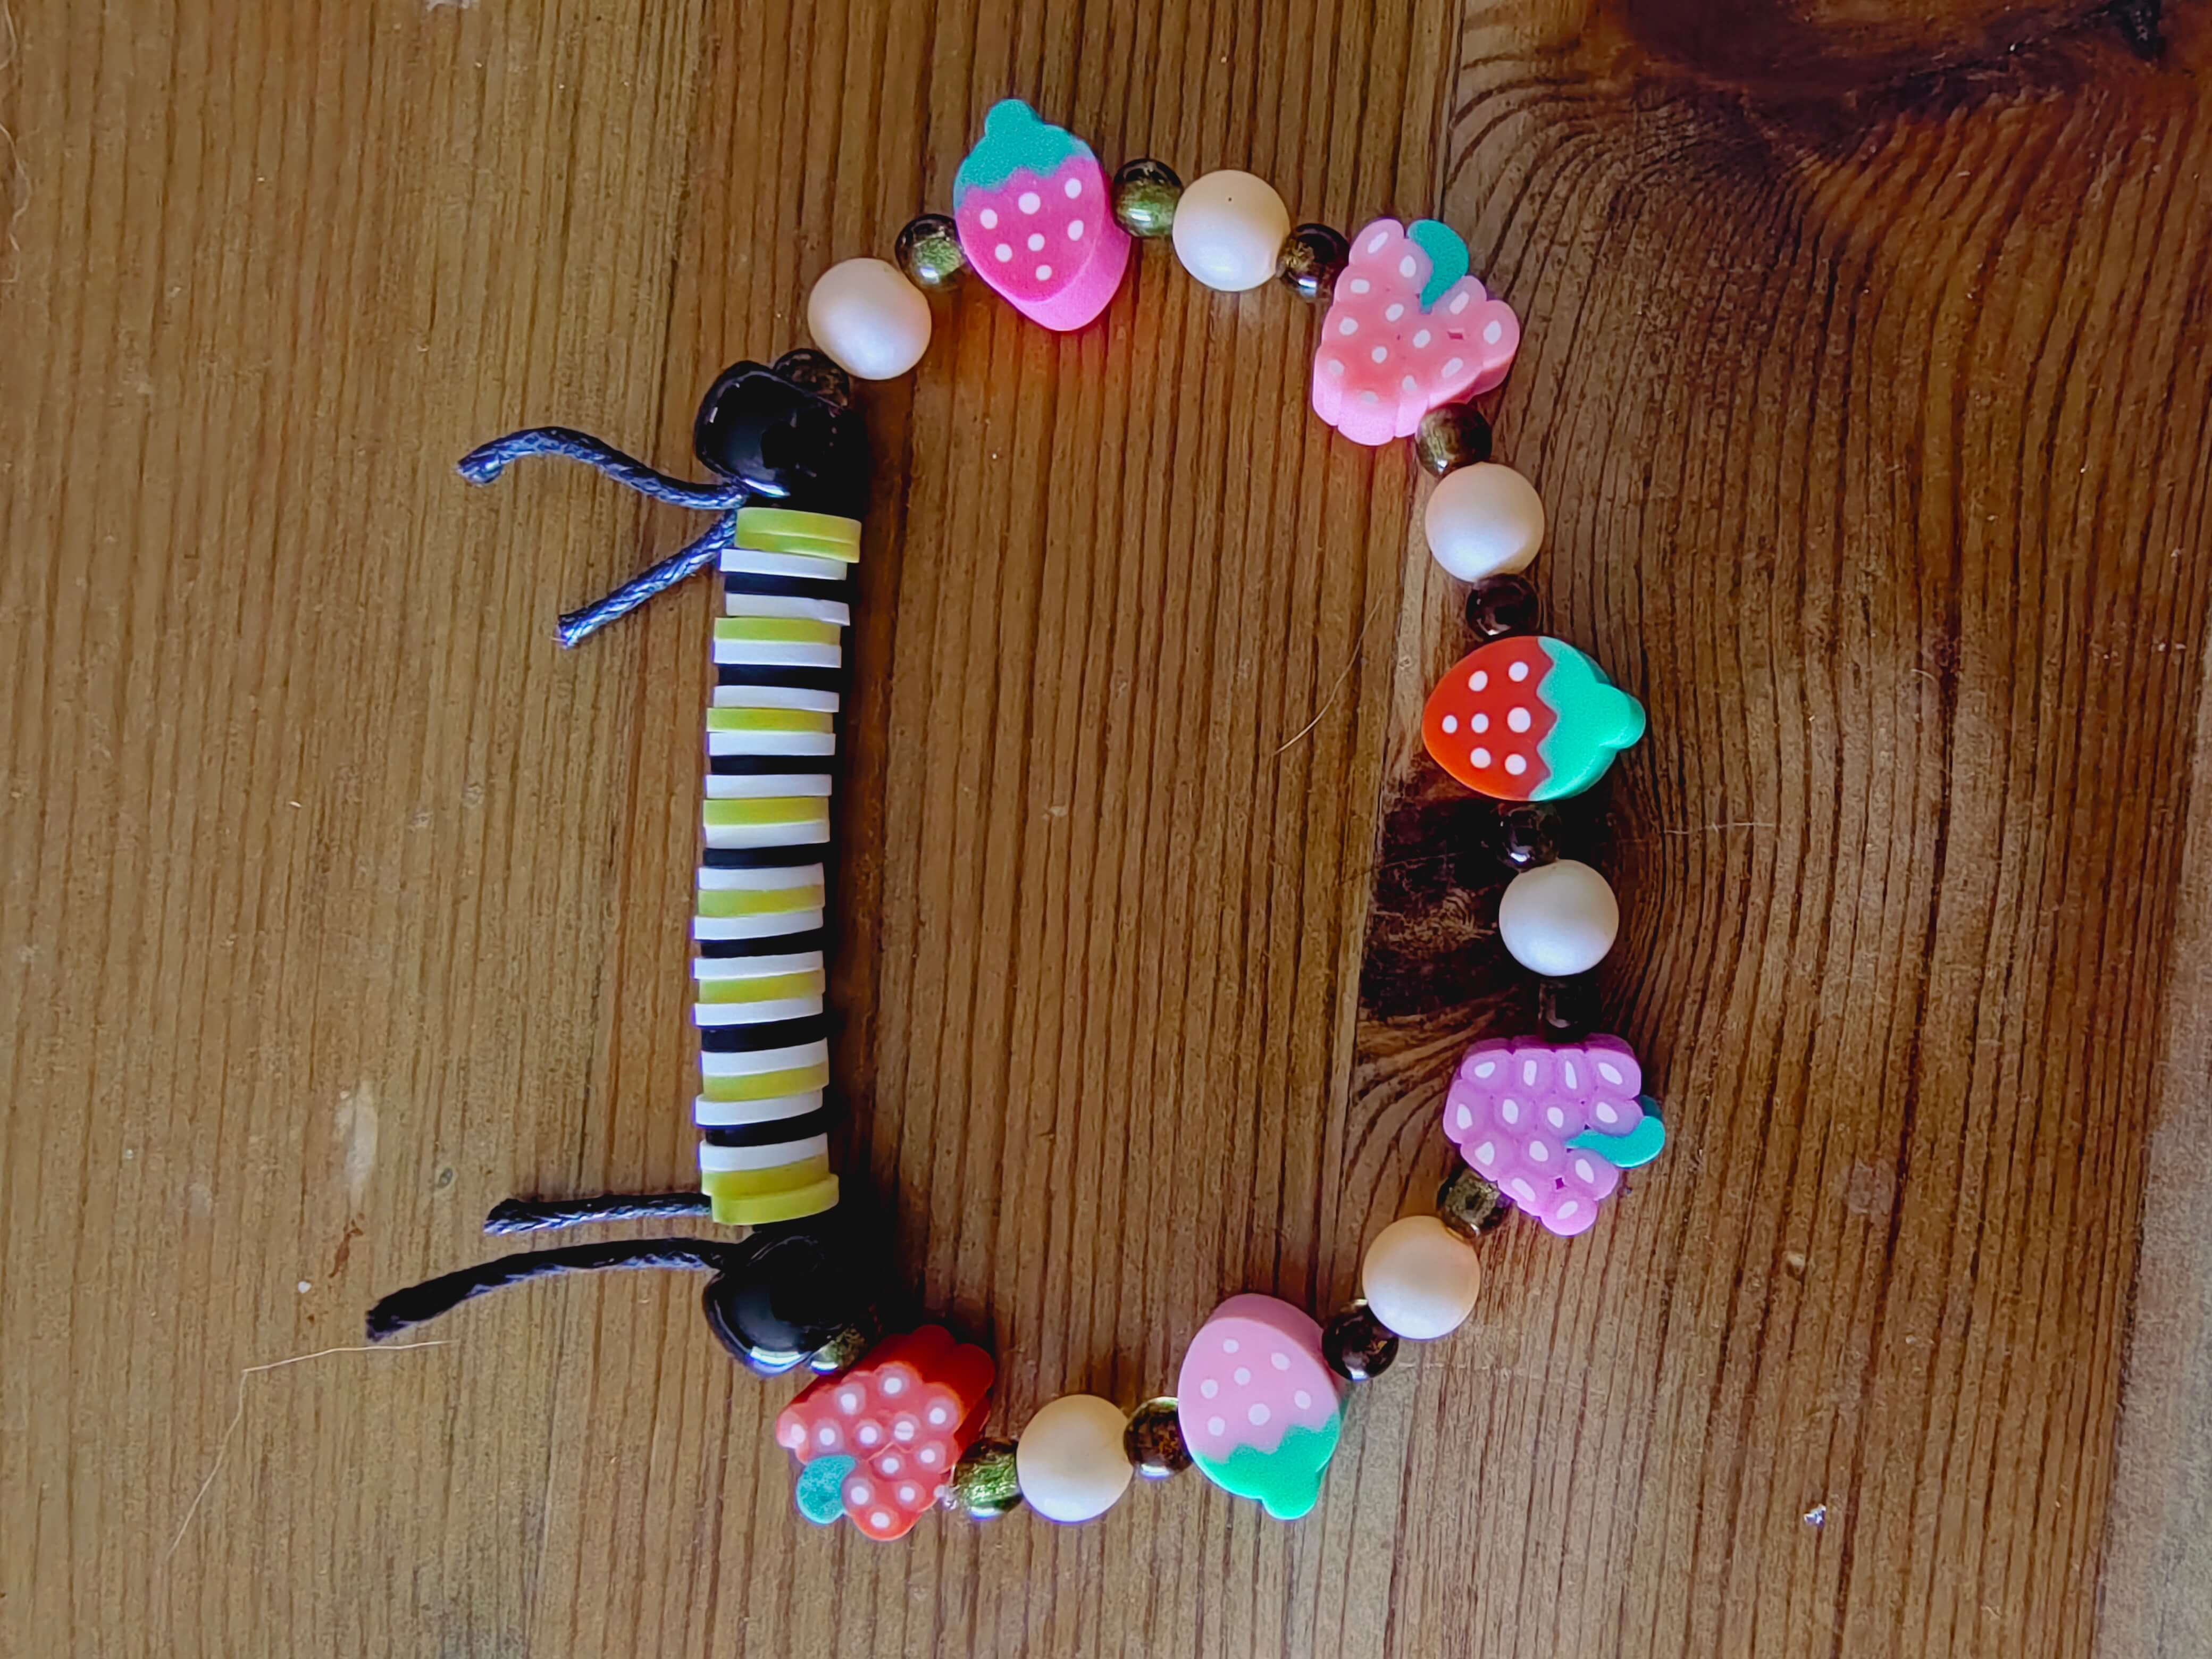
- Scissors
- Yellow, black and white polymer clay 'heishi beads'
- Elastic thread, I use size 0.5mm
- Black thread for the filaments
- Black pony beads (or large round beads)
- Various other beads, as you'd like the rest of your bracelet to look (I like nature themed ones, leaves and fruit and greens)
- A beading board or tray, or a little dish to lay out your beads in
Step One
Cut your elastic thread to size for whoever you're making the bracelet to, plus a couple inches to allow you to tie the thread at the start and end. My length was approximately 8 inches, and I found I wish I'd done more as tying can be quite fiddly! If making a bracelet for someone you don't know the wrist size for, 'average' (a word used very loosely for the diversity of human bodies!) is about 7-9 inches. Remember, the elastic will stretch so a little small is okay! Tie a double knot in the end of thread, leaving enough of a 'tail' before the knot to grip to tie a knot at the very end. Make it nice and tight. Pre-stretch your thread by holding it between your fingers and pulling it a few times.
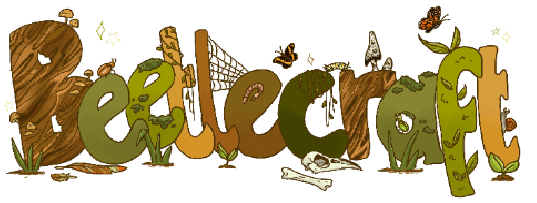
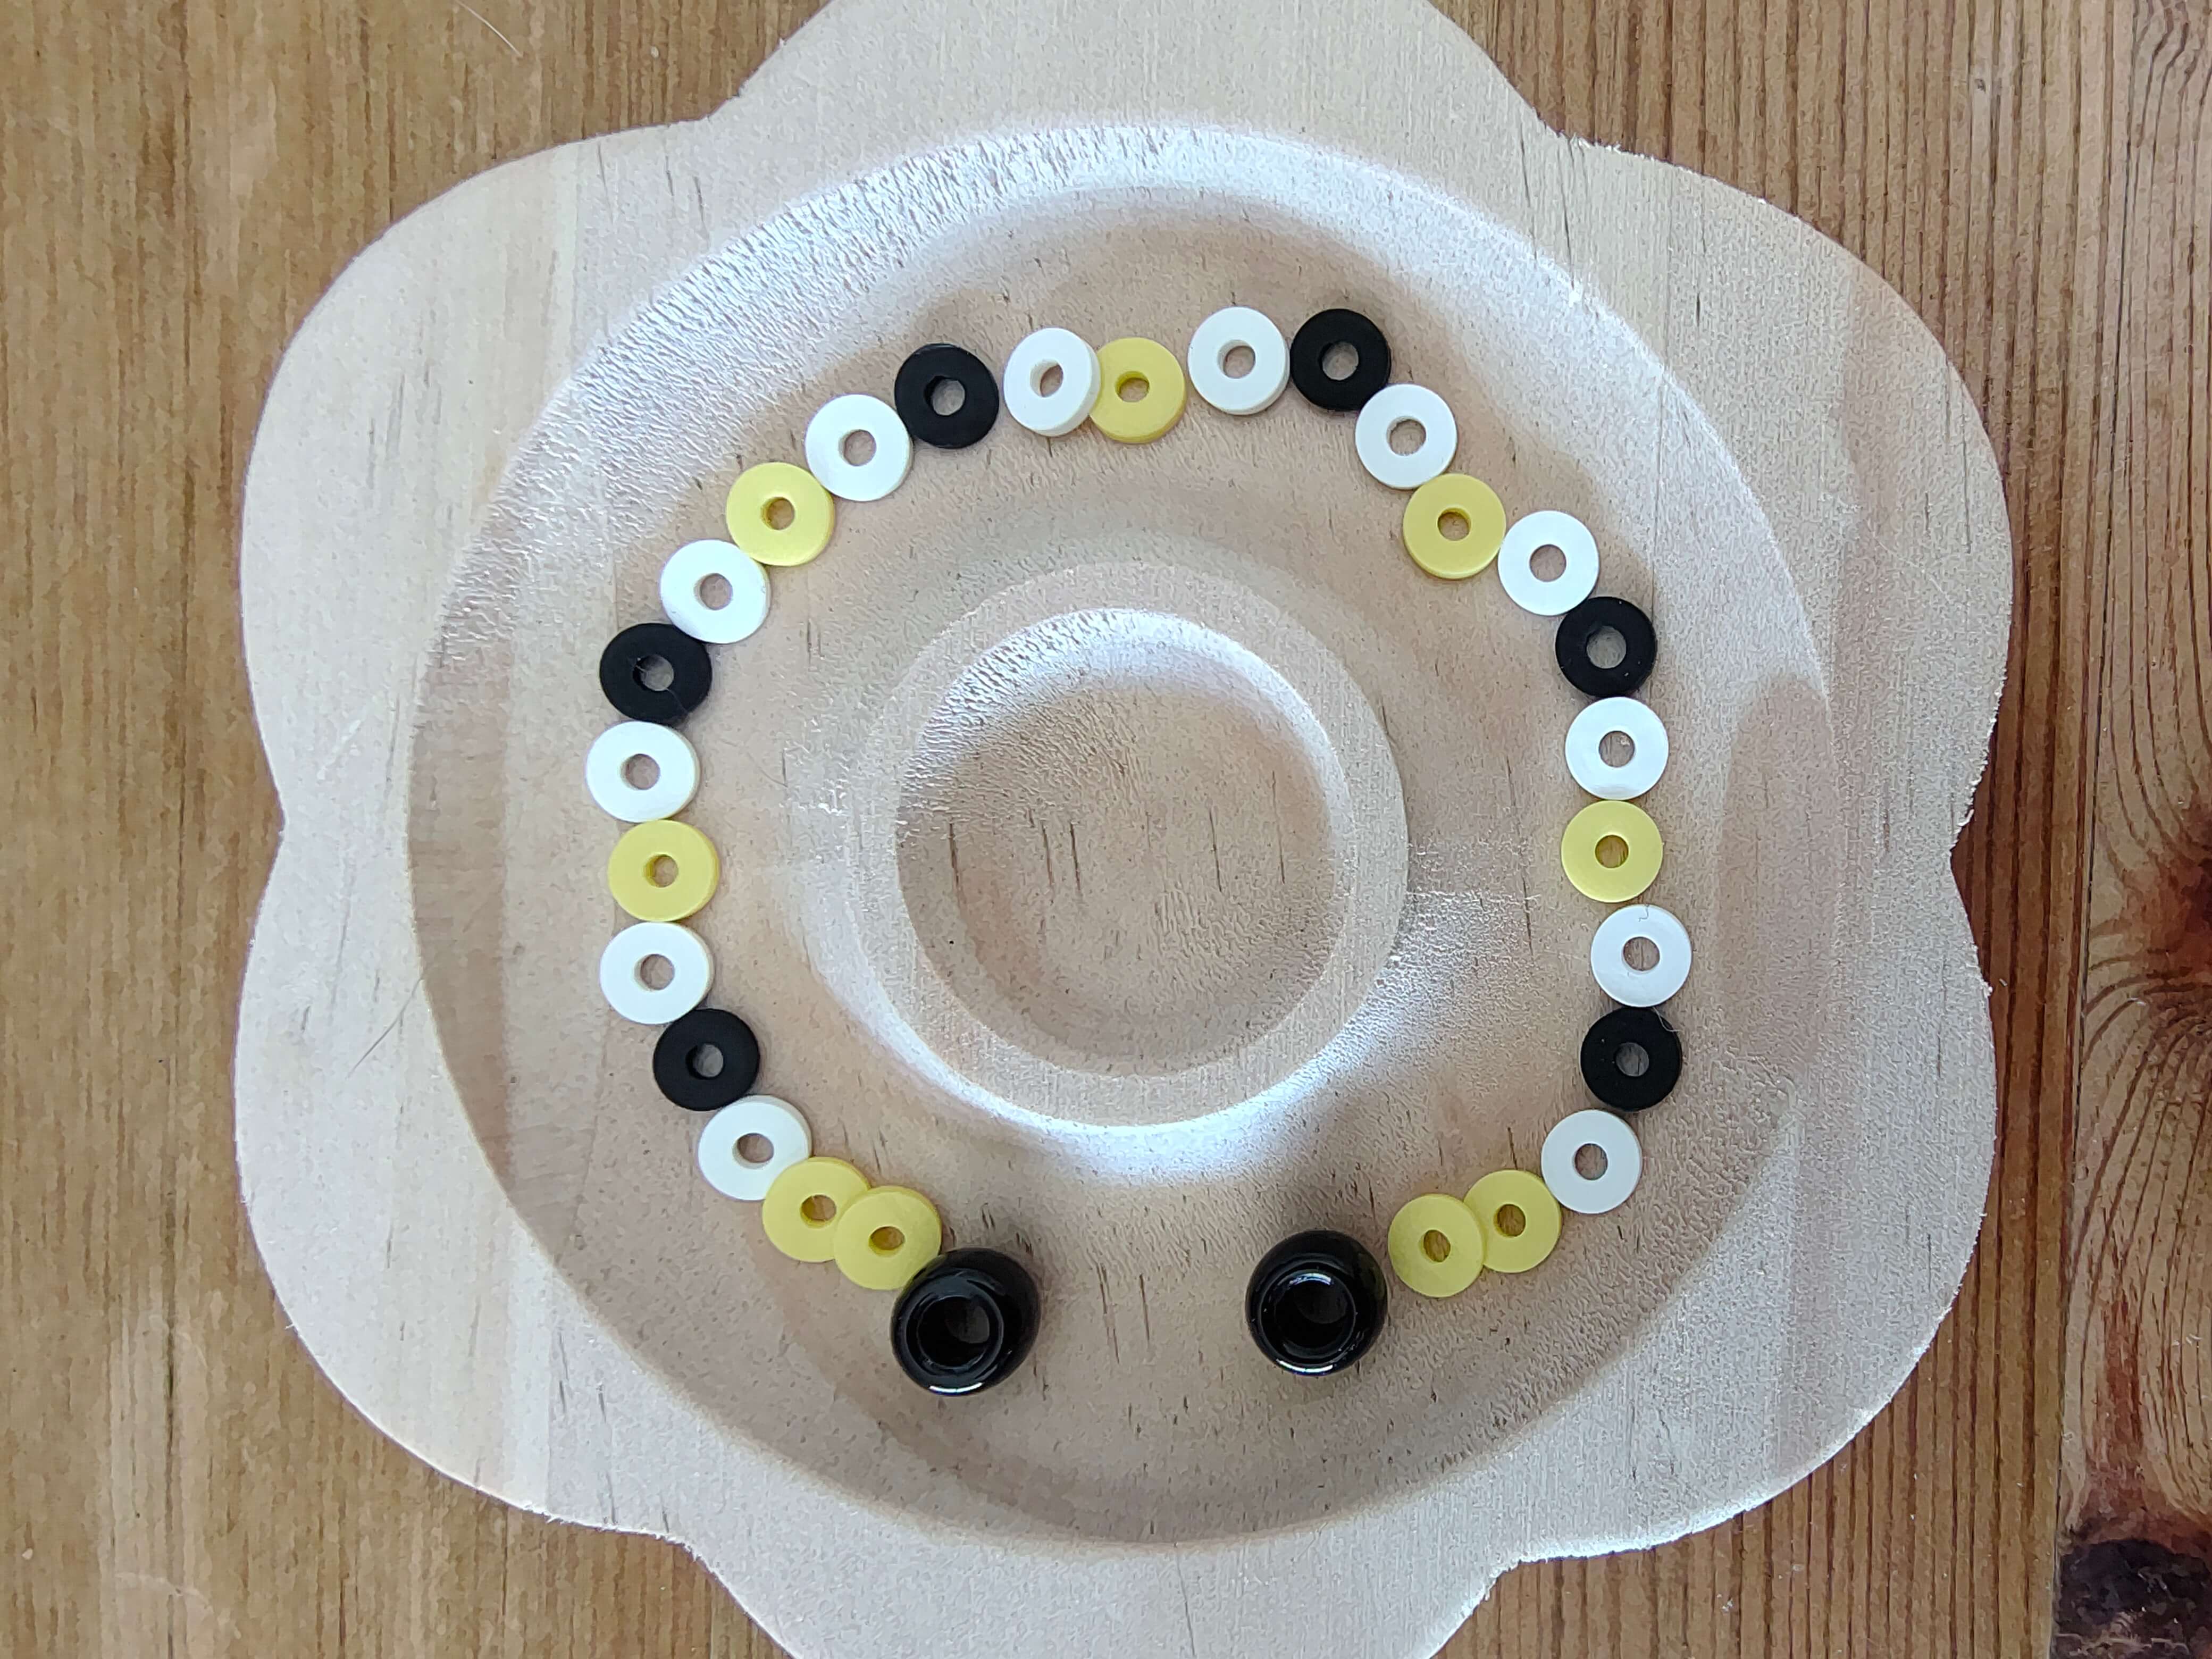
Lay out your beads for the caterpillar. The layout for this is: one black pony bead followed by TWO yellow heishi to begin. The ongoing pattern is then one white heishi, one black heishi, one white heishi and one yellow heishi. End the pattern with TWO yellow heishi beads, and a black pony bead. I make my caterpillars anywhere between 23 and 27 heishi beads long, but you can make them as long or as short as you like. Wanderer butterflies have 5 instars (growth stages), so come in a lot of different sizes!
Step Two
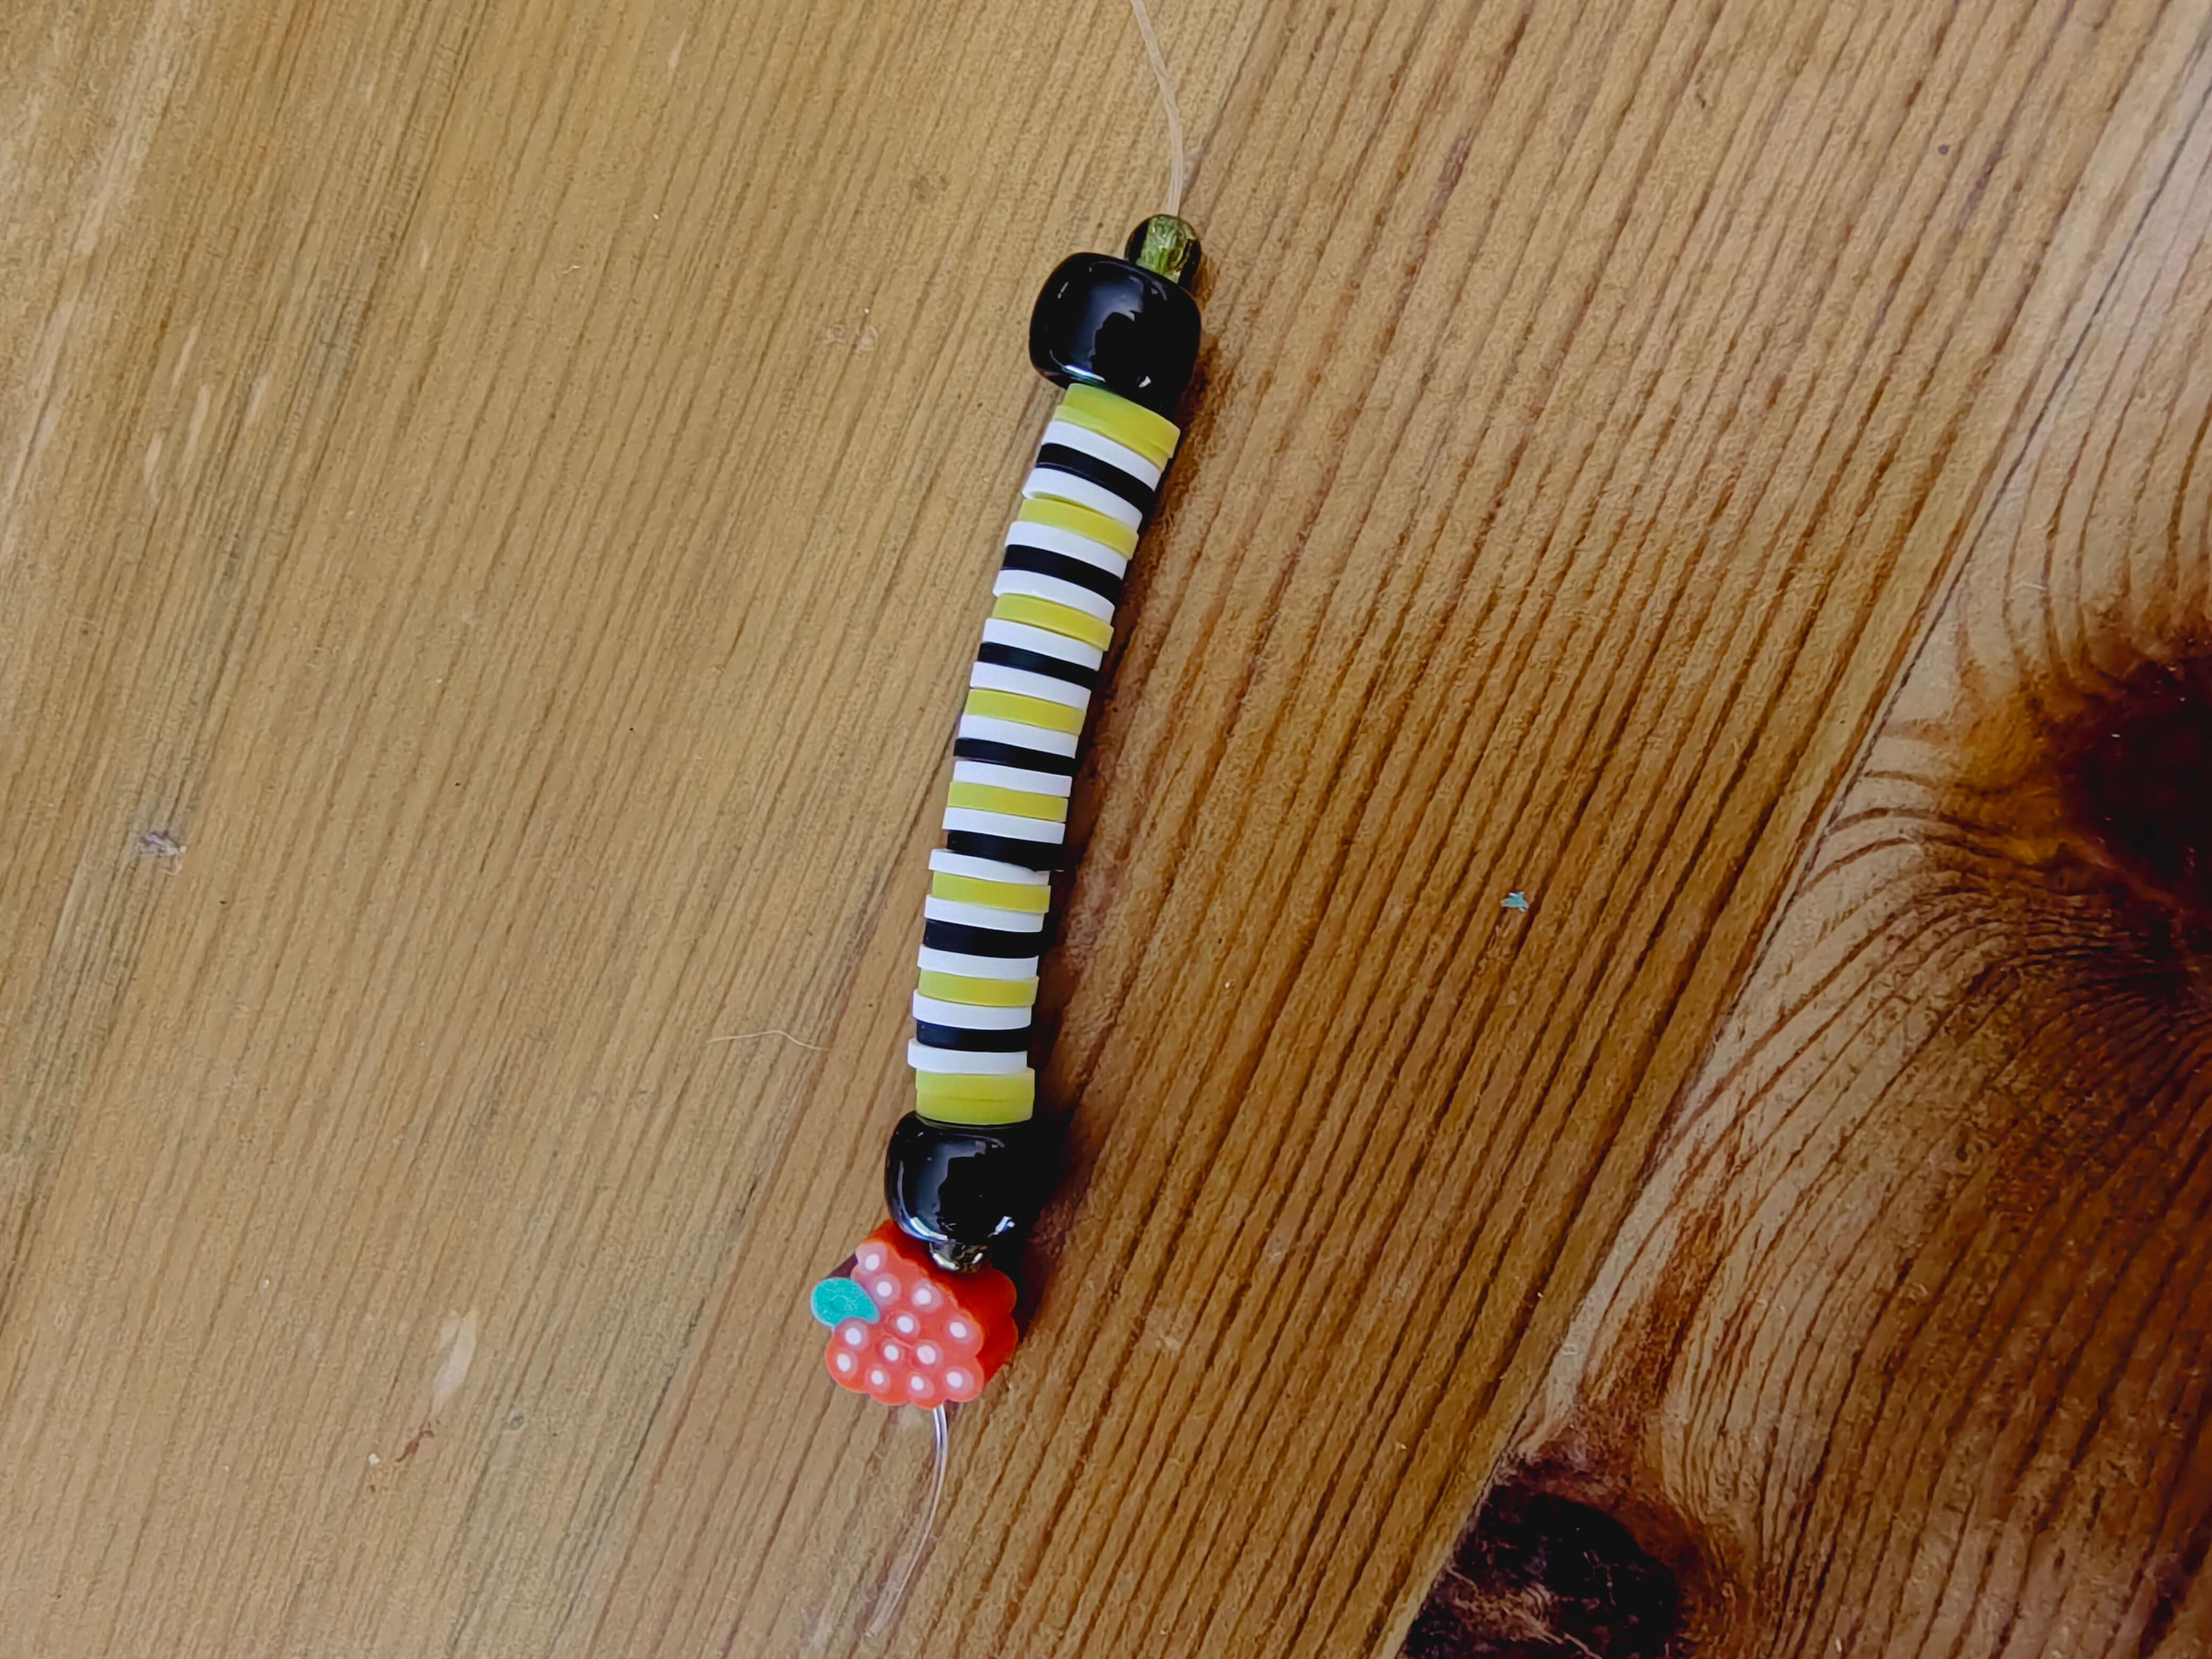
Before you thread on your pony bead as the head of your caterpillar, you'll need some small beads to act as a blocker so the pony bead doesn't slide right over the knot. For this bracelet, I used a fun fruit polymer clay bead! Wanderer caterpillar's don't eat fruit, but I think it's fun to give them a snack regardless!
Then thread on your caterpillar beads, starting with your black pony bead and following the layout as above.
Step Three
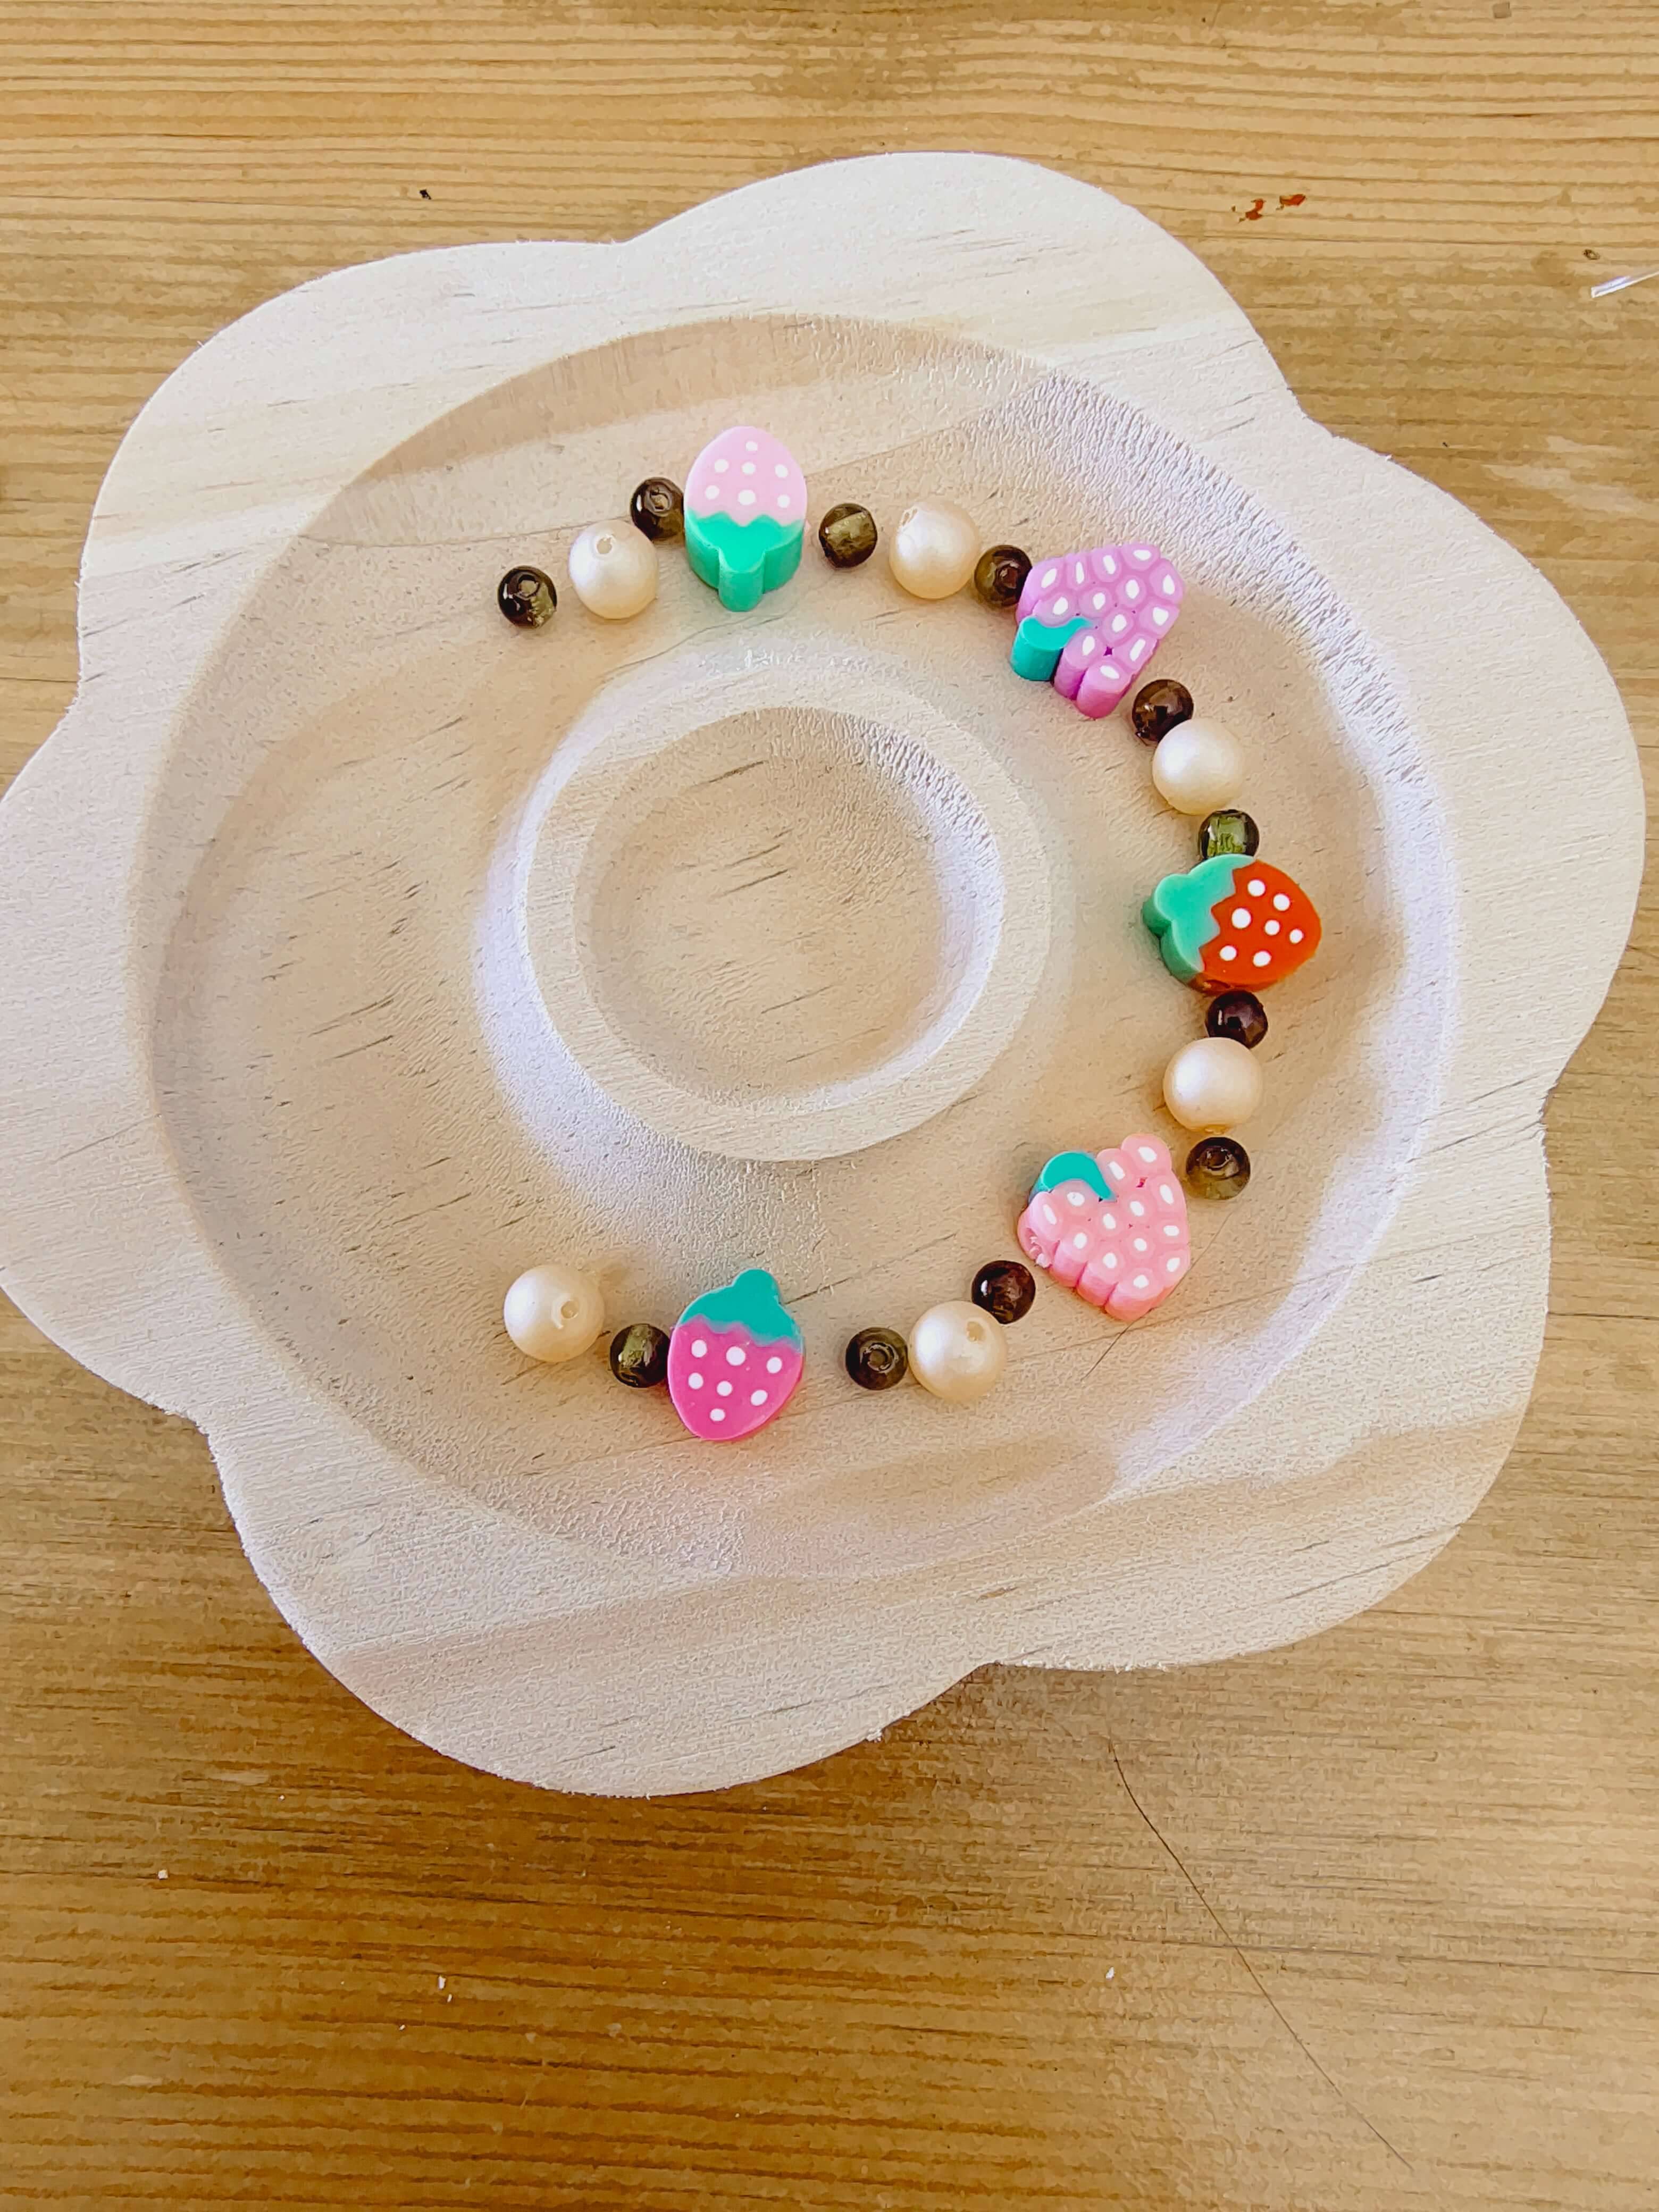
Time to sort out what the rest of your bracelet is going to look like! This can look however you like it, in whatever theme. You could even put multiple caterpillars on your bracelet if you wanted! Op shops are great places to find fun beads, or try your local small craft store. I got a mixed pack from a craft store near me, and I rifle through them to find enough matching beads to make a repeat pattern.
I used more polymer clay fruit beads, plus some shiny pearl beads, and small seed beads for my pattern this time. I like big beads framed by two small beads, but make what makes your heart happy!
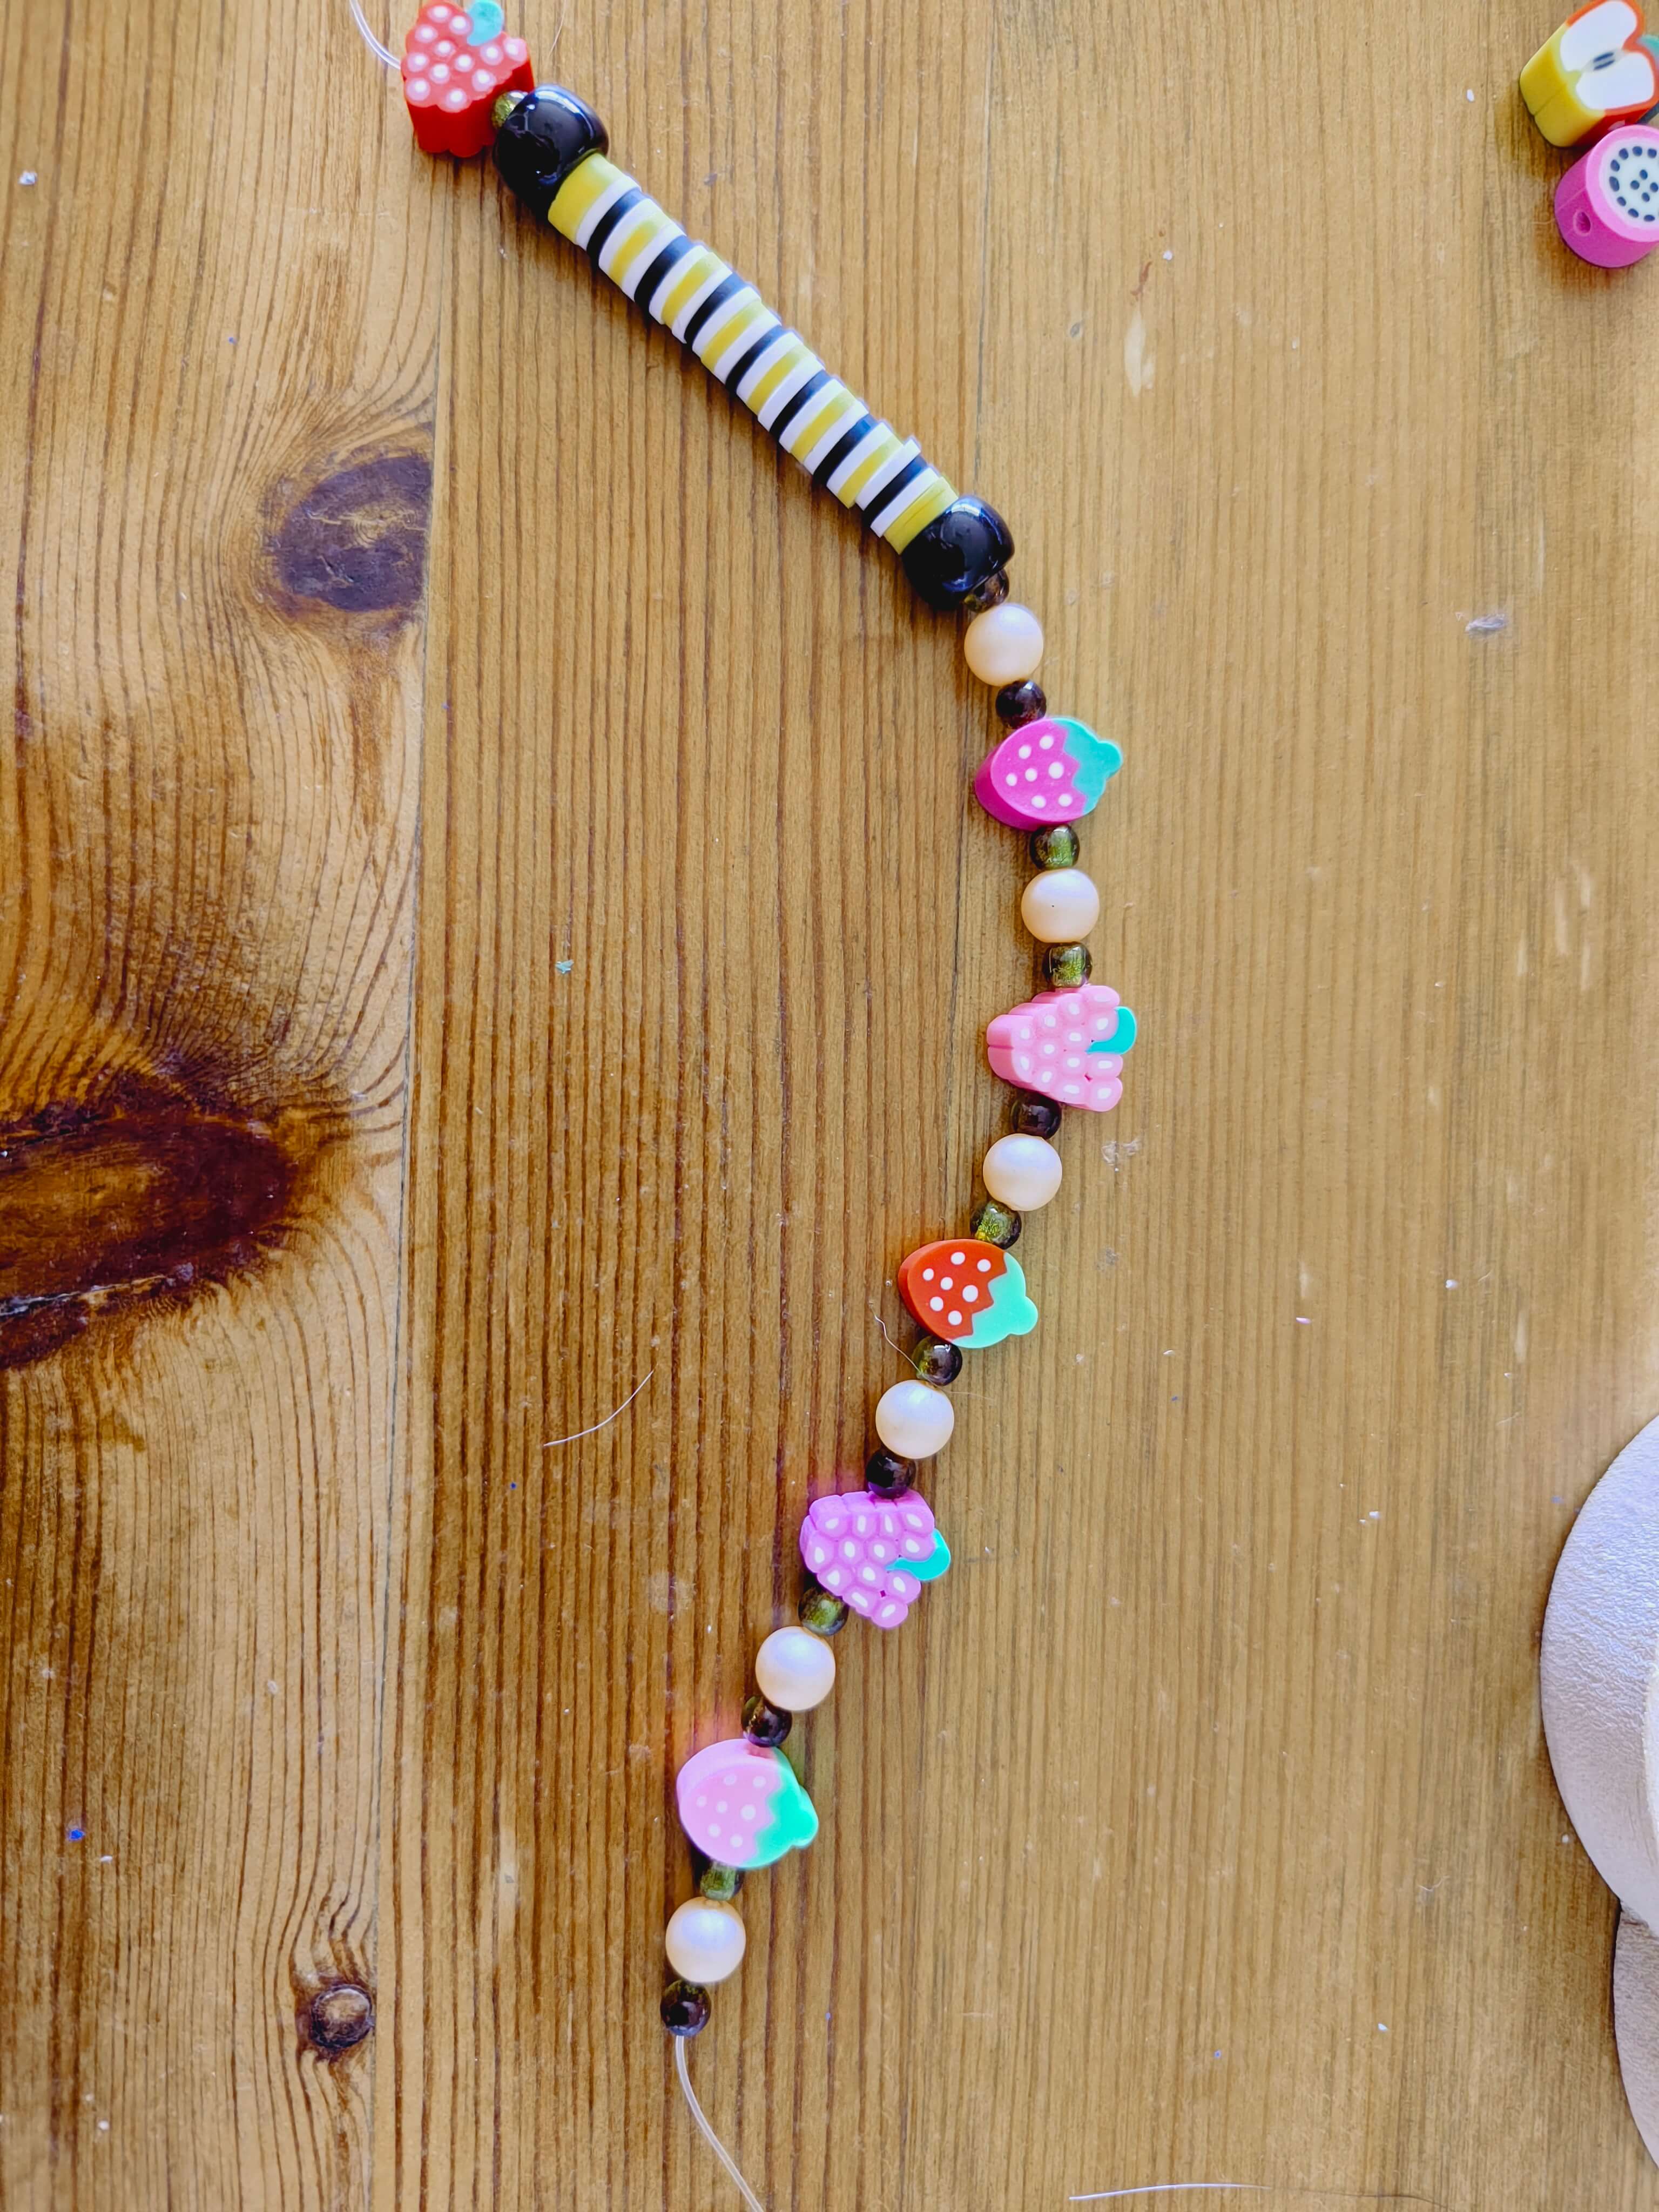
Thread your beads on! Leave enough of a tail to tie a double knot at the end (more than you think, unless you are very dexterous, in which case I'm envious >:{ )
Step Four
Now is time to tie up your bracelet. This makes me want to scream every time, but that's just me vs any seemingly simple task that takes longer than I thought. Inpatience plus fiddly thing does not mix. There are a bunch of different knots you can use to secure elastic thread, such as the surgeon's knot, but I generally just use a tight double knot and a lot of hope. And maybe some glue, if that fails.
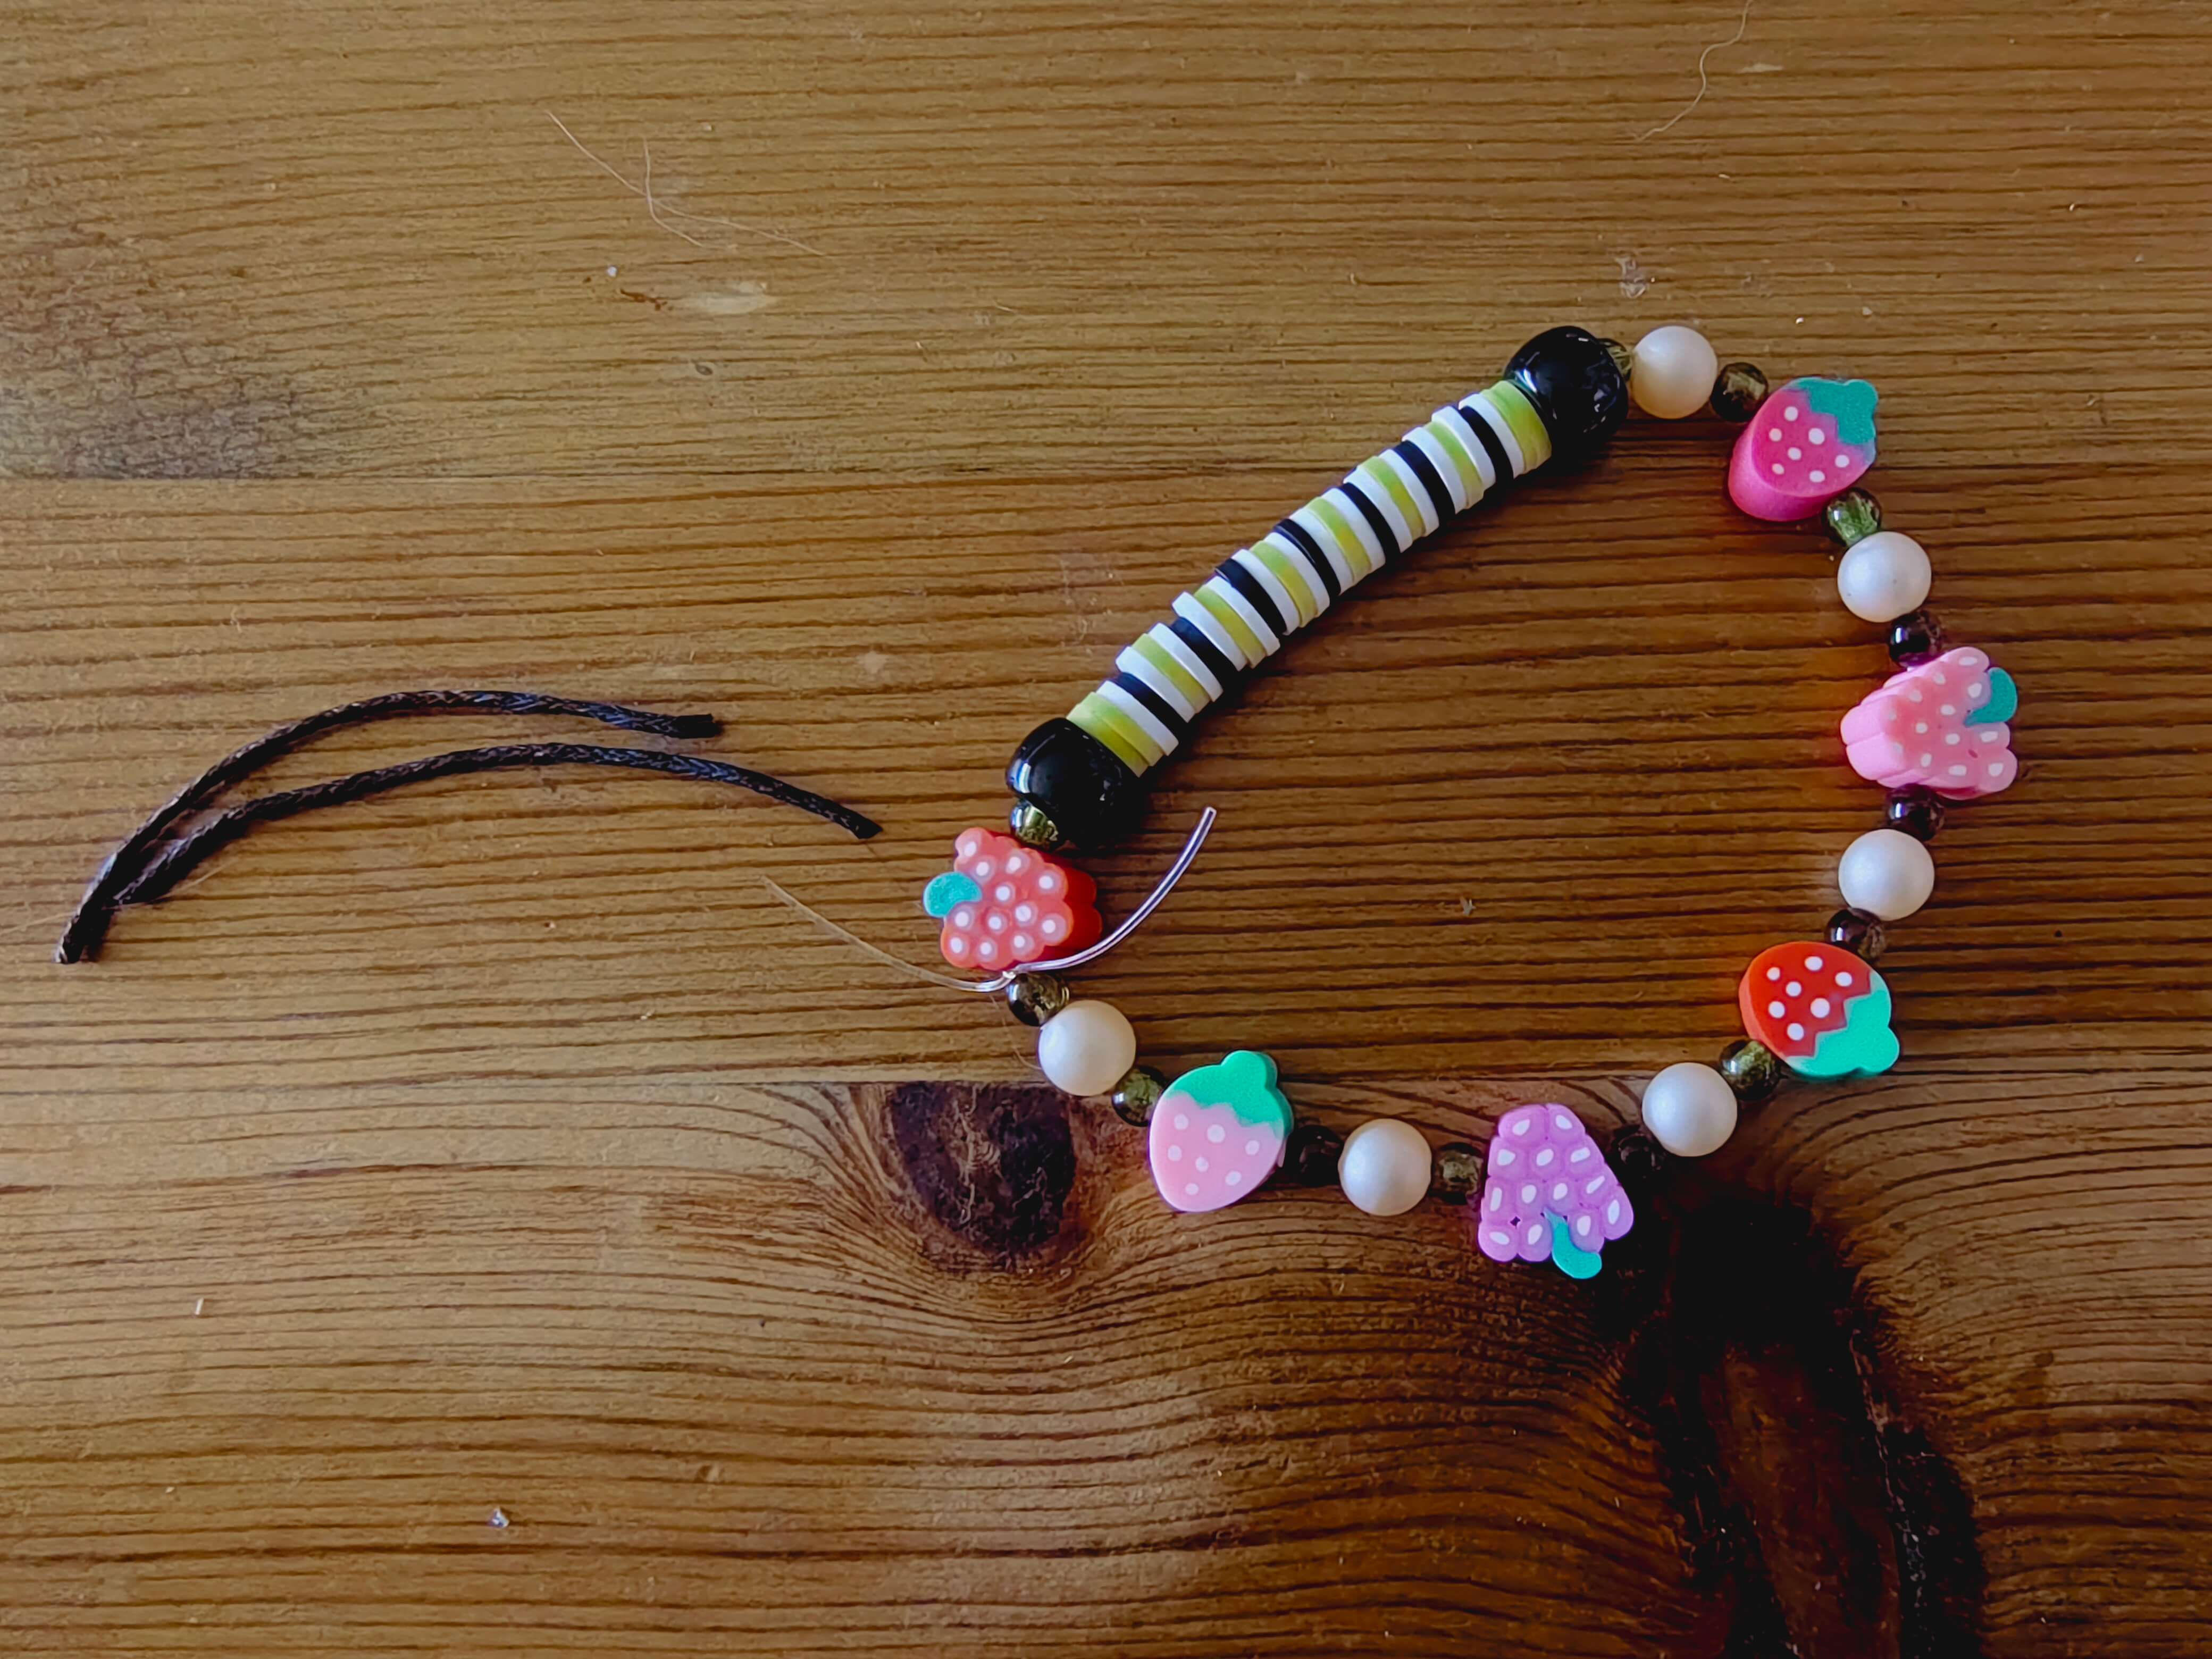
Now cut two lengths of black thread (approx. 1.5 inchs) to be the filaments, which are black antennae-like sensory organs that help the caterpillar move around. They have two on the front, and two on the back. To add these, seperate the black pony bead from the first yellow heishi bead and tie the black thread to the elastic thread with a simple knot, trying to make the filaments equal length. Repeat for the other end. I squish the knot of the black thread into the hole of the pony bead, so the beads all sit a bit more flush with each other.
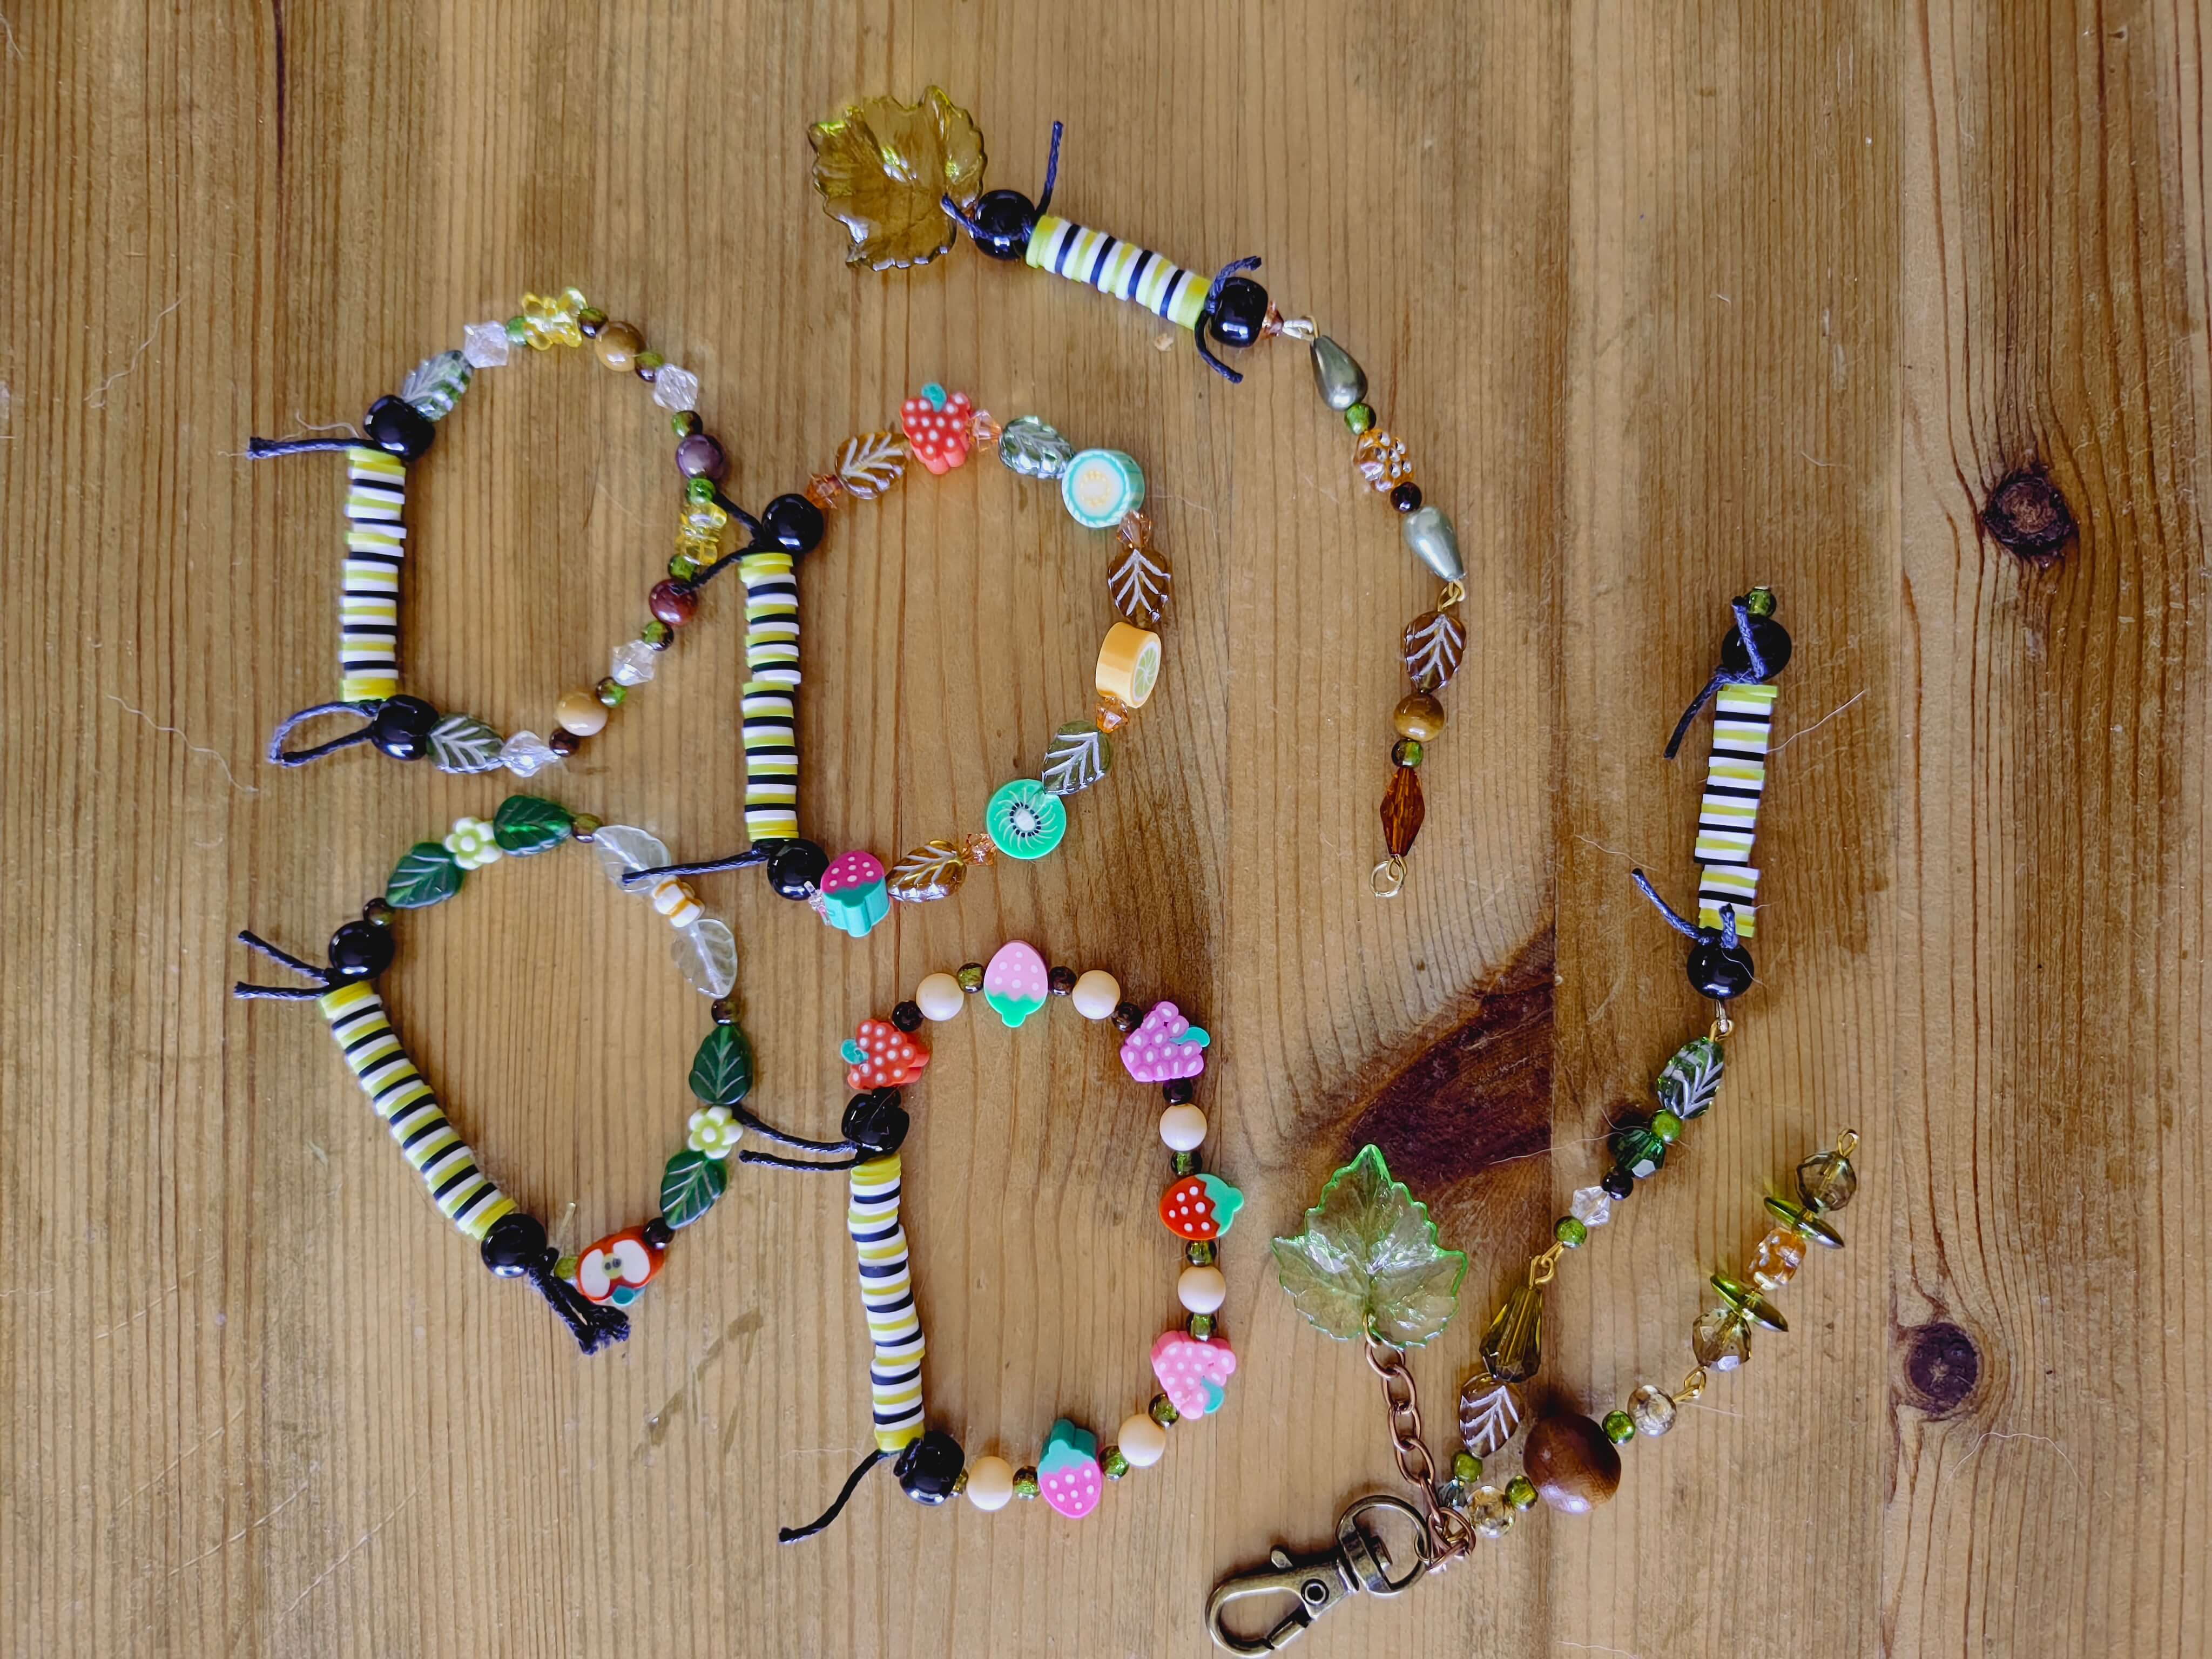
And that's caterpillar bracelets! I've also used these beads to make fun keychains, which I've seen called 'clutter' keychains. I'm also on the lookout for other colour heishi beads that could be used for other stripey caterpillars such as The Very Hungry Caterpillar or the the Crow Caterpillar!! If you know of any other caterpillars this method would work for, please hit me up in my guestbook and let me know!!
Thank you for reading, and happy creating!! Please show me your bracelets if you make them :3